
Thanks to Stanley Bridgeford for writing these instructions for typing unicode on Vista 8 and later.
Step 1
 This is a one-time setup procedure. Once completed, you will be able to switch between your local-default keyboard (En / English for example) and the Greek Polytonic keyboard with just a simple key stroke. For example: the [Left-Alt] + [Shift] key combo. This all begins by clicking the Start button.
Step 2
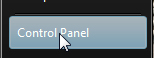 From the Start Menu, select the "Control Panel" option.
Step 3
 Once the "Control Panel" displays, locate and click the "Regional and Language Options" feature. This is where all of the setup activity will take place.
Step 4
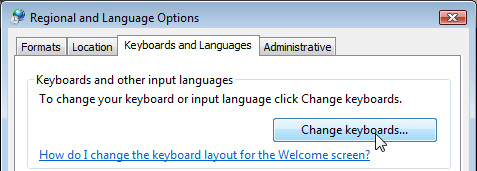 At the top of the "Regional and Language Options" panel, select the "Keyboard and Languages" tab. Click the [Change keyboard...] button to display the next panel.
Step 5
 This will display the "Text Services and Input Languages" panel. From the "General" tab located at the top of this panel, your current-default keyboard layout will be listed in the "Installed services" list. In this example it is the EN English (United States) keyboard. Yours may differ based on your country and region. You will then click the [Add] button to bring up the next panel.
Step 6
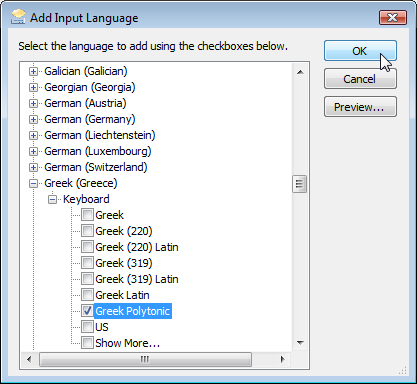 From the "Add Input Language" panel, scroll down until you locate the [+]Greek (Greece) item. Click the [+] and then click the [+] keyboard until you locate the checkbox for the Greek Polytonic item. This is the keyboard option that will allow you to type in full Greek with all accent and breathing marks incorporated as you type. Place a check in the checkbox next to the option. See note below about the [Preview...] button. Click the [OK] button when complete.
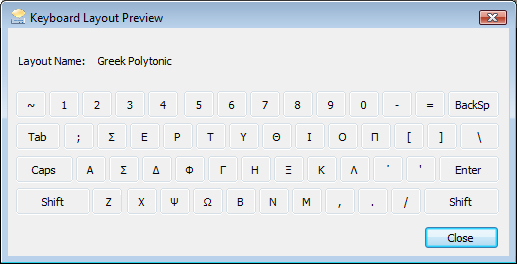 NOTE: The [Preview...] button in the above panel will display the "Keyboard Layout Preview" panel with the name "Layout Name: Greek Polytonic". This is basically a worthless panel other than to verify visually this one time and you have selected the correct option. If you have opened this panel, click the [Close] button and then click [OK] in the "Add Input Language" panel above.
Step 7
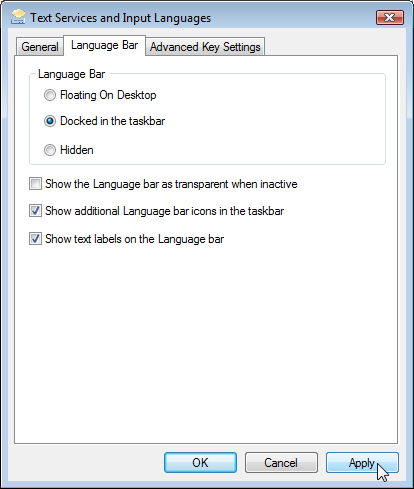 Now select the "Language Bar" tab at the top of the "Text Services and Input Languages" panel. The language bar is a small window that can be set as listed below and will indicate which keyboard and language is currently active. I have it setup in this example to be "Docked in the taskbar" which allows me to display in on-screen as a floating option or return it to the taskbar when not needed. You can return to this step to change it as needed. The other options should be set as indicated in the checkboxes until you have worked with the Language Bar for a while and have a feel for how it behaves. Click the [Apply] button when selections are complete.
Step 8A
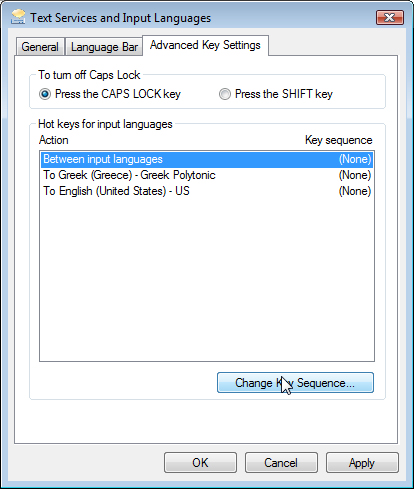 Select the "Advanced Key Settings" tab located at the top of the "Text Services and Input Languages" panel. This is where you configure the keystrokes that will allow you to switch between the language layouts. The "To turn off Caps Lock" option in this panel need not be changed since the Greek Polytonic keyboard does not behave differently between upper and lower case typing. The "Hot keys for input languages" option is where the hot key sequence is established. In this setup procedure I shall setup a single keystroke combo to toggle between the EN and EL languages each time the sequence is pressed. Separate keystrokes can be configured to select directly the language invoked. Here click the [Change Key Sequence...] button to display the next panel in this step:
Step 8B
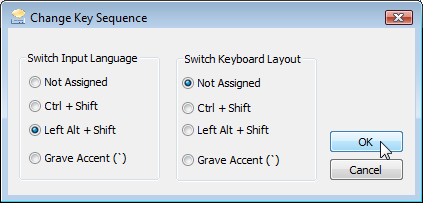 All that is needed on the "Change Key Sequence" panel is to select the Left Alt + Shift radio button. This will become the keystroke that will toggle the Input Language between EN and EL and back again. The "Switch Keyboard Layout" can be set to "Not Assigned" since changing the Language to EL or back to EN will automatically configure the keyboard layout. Unless you wish/need to have multiple Greek or English keyboards (ex: US English QWERTY and Dvorak keyboards) you need not change this setting. Click the [OK] button when selection is completed to return.
Step 8C
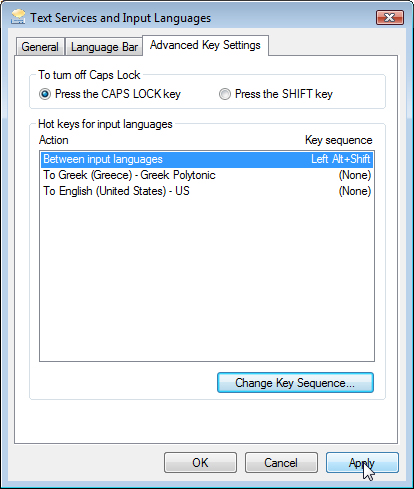 You are now returned to the "Advanced Key Settings" tab. Verify that your keystroke combination is displayed on this list. If everything looks good, click the [Apply] button. Congratulations! You have completed the setup and are now ready to begin typing in Greek and English (or whatever your default language is...). Just click the [OK] button to close this panel and then click the [OK] button on the "Regional and Language Options" panel.
Step 9
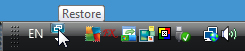 You will now see the EN Language Bar in the taskbar area (usually the lower right corner) of your Desktop screen. Click the "Restore" option to display the full Language Bar on the desktop work area. Practice pressing the Left Alt + Shift keys and watch the Language Bar switch back and forth. See examples below:
Step 10
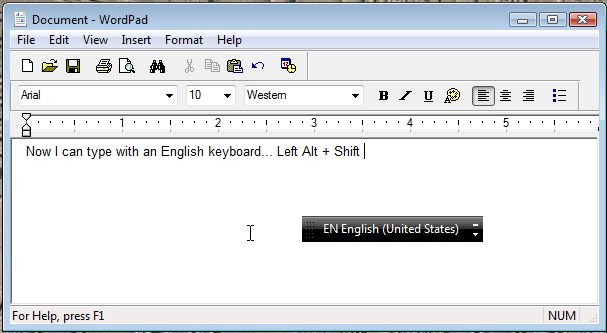 In this example, we see that WordPad is loaded on the Desktop and the font is set to Arial 10 Western. A line of text has been typed. When the Left Alt + Shift key is depressed, the example below is activated.
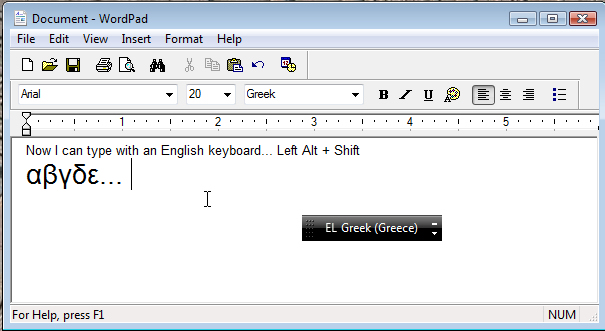 Here we see that the EL Greek (Greece) layout is now active. The font is still Arial (I've increased the font size to 20) and the language is now Greek. Not all programs will display this information as you type, but the floating Language Bar will always indicate which language / keyboard is currently active. If you wish to close the Language Bar and return it to the taskbar area, just click the "Minimize" option on the upper right corner area of the Language Bar. If you switch to a program (example: Solitaire) that does not accept typed input, the Language Bar will return to the taskbar automatically.